MPGuino
(→Software & Release notes) |
|||
| Line 246: | Line 246: | ||
Here are the latest release notes as of this writing. Get the latest SW from [[The Arduino Code]] | Here are the latest release notes as of this writing. Get the latest SW from [[The Arduino Code]] | ||
| − | |||
Revision as of 14:41, 25 August 2008
Welcome to Combustory
Any questions or comments:
- Send them to - combustor@combustory.com
|
Summary
This is an impressive use of the Arduino platform. One that will actually pay for itself too. A small group of folks banded together and created an open platform called http://opengauge.googlecode.com where you will not really find much information concerning this device, but there are lots of information in a forum at http://www.ecomodder.com, where you will find tons of useful and fun ways on improving gas mileage for any car. To explain what these folks did for the average working Joe, who can't quite afford a car newer than 1995, is just amazing. It still works for just about any car with fuel injection, but for cars built before 1996, there is no OBD-II option.
They came up with a way to build a reasonably low-cost device that will gauge your MPG, even for cars that do not have an OBD-II interface in there car. At the moment it is restricted to use in cars with fuel injection, but given enough time they may even find a way to gauge cars with carburetors. To cut to the chase, this device uses inputs from the Vehicle Speed Sensor(VSS) and one fuel injector control wire, both of which are easily found in just about all fuel injected cars, minus mechanical fuel injection, which only Mercedes seemed to make reliably albeit expensively. So, sorry all those 300E owners, you can't play with this toy right now.
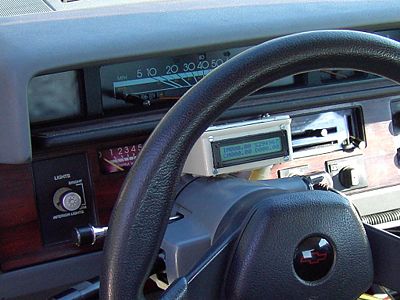
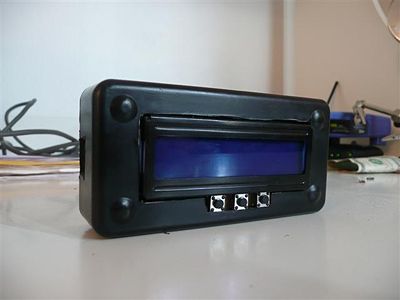
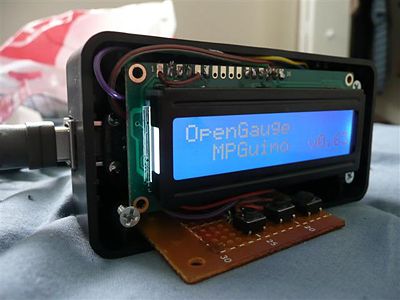
The device sports an LCD screen with many display features that include Current,Instant and Tank MPG as well as Trip data for MPG, Mileage, and Tank Gallons. There are many other options and I recommend you reference the User Guide below for more detail.
Functional Description of the Solution
To further detail the solution, the VSS provides a pulse input related to the speed and distance traveled, meaning from this sensor you know how fast the car is going from the pulse frequency and how far the car has traveled by counting the actual number of pulses. Pulses per mile vary from car to car and based on the forum I saw a range in the 4,000 - 10,000 pulses per mile. The injector control wire provides the fuel flow mass. By making the relation of the known flow rate of an injector and the amount of time that the injector is turned on, you can calculate the the actual fuel mass flow rate your car is using.
On the electronics side they used the Arduino platform as the microprocessor and threw in some supporting components to prevent small fires that create anger and horrible smells. I hate the smell of fried electronics, unfortunately I know it too well. The microprocessor polls the sensors in the micro-second realm, and writes the results to the LCD in the 1/2-1 sec. realm. This gives the user a near real time view of the actual data.
There really is not much at the high level design function, but as they say, "The Devil is in the Details".
Theory of Operation
Fuel Injectors
To completely simplify a fuel injector, just imagine a water faucet valve. When the valve is open, the water flows out. The amount of water that flows out depends on the size of the faucet opening and the pressure of the water behind the faucet. For a fuel injector, the manufacturers specify a lbs/hr of fuel flow by knowing the opening of the injector and specifying the constant pressure for which the injector supply is supposed to maintain. Therefore, if you provide the proper pressure to the injector as specified and you open the injector for one hour, you should get the specified pounds of fuel flowing out of the injector. For example, a 20 lb/hr injector will supply 20lbs of fuel if left turned on for one hour.
This makes the calculation fairly simple to determine a fuel flow rate for your car by measuring the total amount the injector is open that comes from the Injector Sensor of the MPGuino and it is measured through the pulse width sent to the injector by the car computer. Also known as the injector pulse width. So the total time for each pulse width over a given time is the total time an injector is open. This measurement is usually taken in a second time frame and an injector has a limitation known as a frequency response or a max number of pulses per second, which is related to the mechanical response time that the injector can open or close. The MPGuino measures the total time the injector is open, so we will just take that number as a known measured value.
Ti = Time the injector is open as a ratio of a known time = For calculation purposes we will set it at usec/sec
Fr = Fuel flow rate is a known from the manufacturer in lbs/hr
Therefore:
Fuel usage rate = Fr (lbs/hr) / 3600 (sec/hr) * Ti (usec/sec) /1000 = (lbs/sec)

Example:
Ti = 500 usec/sec as measured by MPGuino
Fr = 20 lbs/hr as specified by manufacturer

VSS - Vehicle Speed Sensor
The VSS count is fairly straight forward. There is a device on your car that rotates and creates a certain number of pulses per revolution. The sensor is usually attached to your transmission and it has a direct gear ratio to your tires that I will call the rolling ratio. This sensor is used to feed the vehicle computer the speed and distance data. The actual gear ratio has only one main variation, and that is the tire diameter. For the MPGuino to calculate the the MPG, this input is critical for determining the distance traveled. The VSS count is typically measured in counts per mile.
Theory vs. Reality
As with any engineering of a product you will have fudge factors. The important thing to realize is that you always design to get the fundamentals close and then expect to calibrate to meet the accuracy needed for the function. For this product we will evaluate the best way to calibrate and adjust to improve the accuracy of the numbers. This may not be necessary at all if your goal is to get feedback on your driving habits, then the accuracy does not matter, as long as you realize that the MPGuino is changing your driving habits to conserve gas AND best of all save you money.
So first let's discuss the factors that will affect your accuracy.
Factors NOT in our control:
Is it possible to control or measure these factors? yes, is it practical? not in my opinion. So these factors will introduce errors that will need compensation in the fudging process. I feel it is a pretty safe assumption that over time these factors will average within a range that will permit fudging.
Injector Pressure - Your car has a pressure regulator to manage your fuel manifold pressure, and it will regulate to it's setting. You could measure your pressure, but then you would have to know how that affects the fuel flow through the injector. We also do not know how the pressure changes over time and this can affect your fuel flow.
Injector Efficiency - Well, since MPGuino is a device that was targeted to older cars, then you have to expect that injectors tend to clog and become less efficient over time. The only way to calibrate that problem is to measure the actual flow through each injector. Have fun if you want to tackle that project. `,~)
Rolling Ratio - The rolling ratio is a constant changing ratio that will affect your VSS counts per mile. The main reason it changes over time is due to tires. As a tire gets more worn your VSS counts per mile will increase. When you replace that old set of tires with new tires, you will have less counts per mile.
Fudging/Calibration process
There are two areas I want to focus on to get this system as accurate as possible. Let's consider fudging the fuel flow rate and measuring the VSS counts per mile. I am taking this approach, because measuring the VSS counts is a practical option and it can be done with some accuracy. In contrast the fuel flow rate used to calculate the total fuel usage is not very measurable and therefore should be fudged.
To measure the VSS counts per mile get on the highway and find a mile marker and reset you VSS counts to zero. Drive ten miles as marked by the mile markers and note your VSS counts. Divide by ten to get your VSS counts per mile. Take an average of this process if you really want to nail it down, but I do not feel that is necessary. You may need to test this count every 6-12 months to readjust this number. You can compare your numbers to you odometer, but understand that the odometer does not take into account the tire diameter as accurately as your measurement, but it can be used as a verification that you are in the ball park. The best verification would be if you noticed that you have a fairly repeatable offset from the odometer and your calculation.
To measure the fuel is much more difficult. Really the best way to do measure the fuel would be to drain the tank and run the tank dry of fuel. Now weigh the amount of fuel and put it in the tank. Run the tank dry again and compare the actual fuel usage with the MPGuino. Again do this multiple times and take the average. Personally I would not do this at all, but it is the only real way to get acuracy. For a much more practical method, start a fuel usage log. Go to many different gas pumps and take an average over time. I have noticed that the cheapest gas stations tend to calibrate to the high side of the legal limit, if not actually outside the legal limit. Try to keep a standard procedure, like only filling to the first click off. Compare your fuel usage average to your MPGuino fuel usage average and look for a trend. Now fudge the fuel usage to match.
Requirements and Knowledge
- Basic soldering and electronic building skill
- The following parts list for the Arduino assembly
- 2 5.1v zener diodes
- 1 2n3906 PNP Transistor
- 1 220 ohm resistor
- 2 100k resistors
- 3 tactile switches
- 1 freeduino arduino clone (any arduino can probably be made to work) i.e. an iduino: http://spiffie.org/kits/iduino/ or a Freeduino
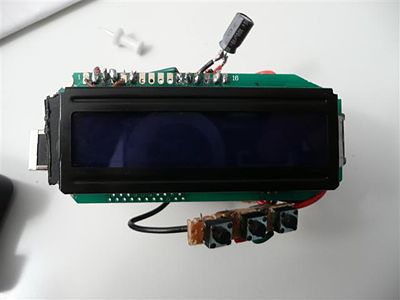
- 1 LCD (others might work as well, check pinout and chipset, etc). 16x2 LCD Module While Characters Blue Backlight Or a green one from sparkfun or mouser (a number of folks like the green ones better)
- Sufficient Perfboard
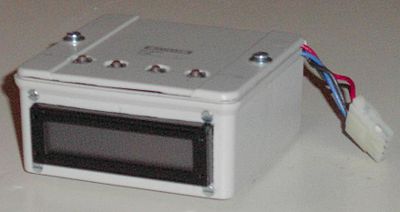
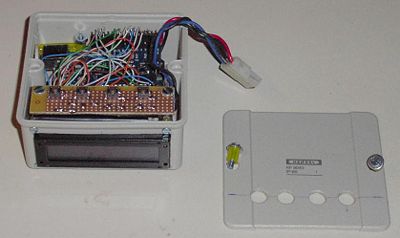
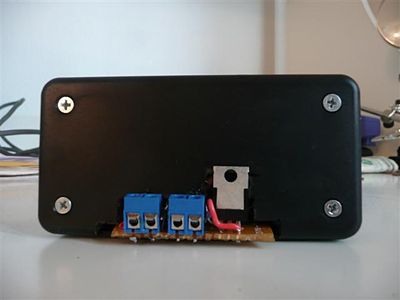
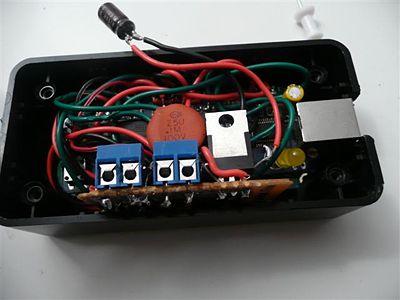
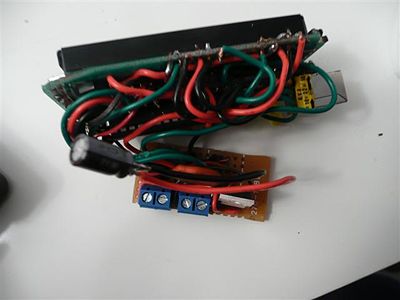
- A case to hold it all together
- Additional parts for the iDuino assembly
- 1 7805 Voltage Regulator
- 1 1n4004 diode
- 330 uf cap
- 1 .1uf cap.
- You will need to find the wires for the VSS on the vehicle computer or control unit.
- If you're lucky you won't need much troubleshooting skills
Assemble the Electronics
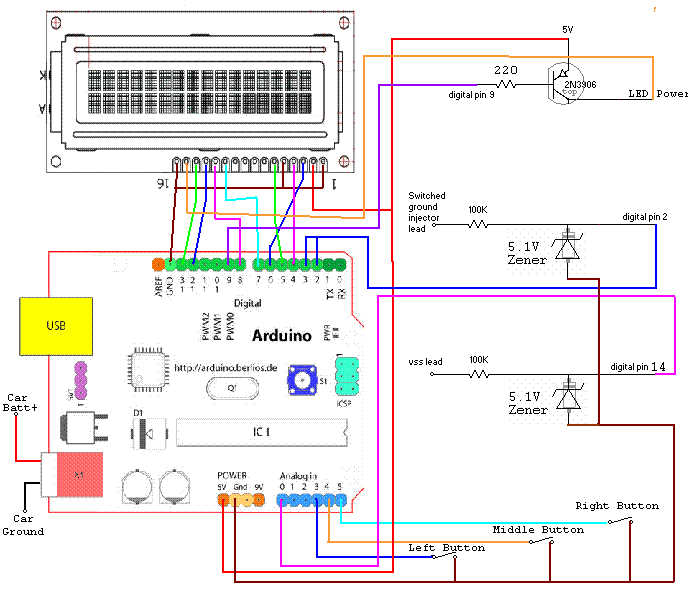
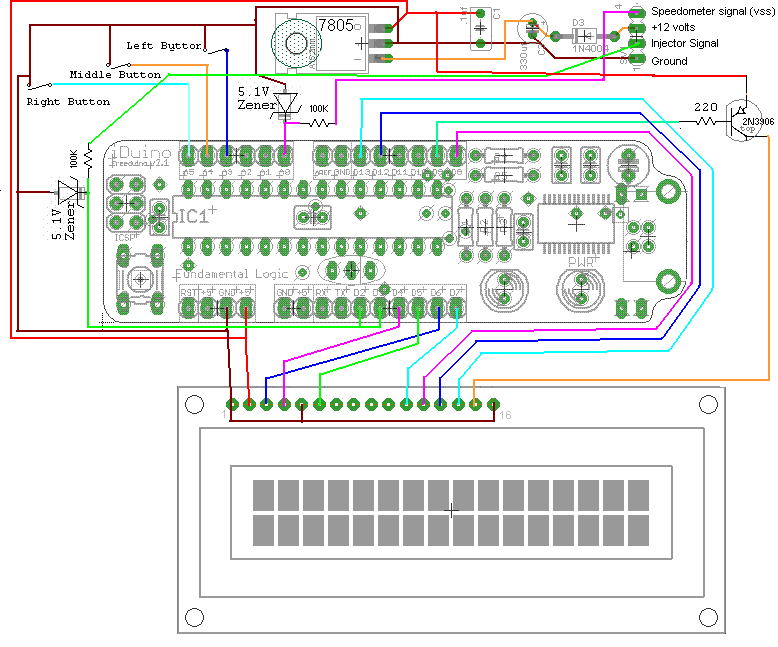
Here are the schematics. This should be enough for most of you. There are two assemblies that are possible to build. The Arduino or the iDuino.
Notes:
- The only two output leads for the VSS and the injector, other than that a 12vdc supply, and that is it.
- The Analog pins in this schematic show 0-5 are used as digital I/O, therefore, Analog pin 0 is Digital pin 14 then count up from there.
Arduino Assembly Schematic
iDuino Assembly Schematic
Enclosures
User Guide
Screens
1. Instant MPG/Speed Current MPG/Distance
2. Instant MPG/Speed Tank MPG/Distance
3. Large font instant MPG
4. Large font current MPG
5. Large font tank MPG
6. Current MPH, MPG, Miles, Gallons
7. Tank MPH, MPG, Miles, Gallons
8. Instant Raw Data (very useful for connection troubleshooting) Injector open seconds, Injector open microSeconds, Injector pulse count, Vehicle Speed Sensor pulse count
9. Current trip Raw Data Injector open seconds, Injector open microSeconds, Injector pulse count, Vehicle Speed Sensor pulse count
10. Tank trip Raw Data Injector open seconds, Injector open microSeconds, Injector pulse count, Vehicle Speed Sensor pulse count
11. CPU Monitor Max CPU %utilization, Tank running Time mm.ss, Free Memory (bytes)
Start-up Settings
There is also a setup screen that displays the first time the program is run and by pressing all three buttons at once. It walks you through the following setup variables. Use left and right buttons to select the digit you wish to change or the OK or Cancel (XX) items. Use middle button to rotate the current digit or select OK or XX if that is where the cursor is. Selecting OK will save the currently displayed value to the current variable and advance to the next variable. Selecting XX will just advance to the next variable.
1. Contrast - This comes up first on a brand new run and changes on the screen are immediate so if you can't see anything try pressing middle button a few times.
2. VSS Pulses/Mile - use this to adjust displayed speed/miles. If the speed/miles displayed on the mpguino is low then decrease this number by the percentage that it is off and vice versa for high readings. Most asian cars will be a multiple of 8204 and GM will be 10000, we are hoping users will contribute model specific data here.
3. MicroSec/Gallon - use this to adjust displayed fuel consumption. You may want to readjust this initially to get a ballpark MPG reading (after VSS Pulses/Mile is deemed accurate), then calibrate it with a couple fillups. If the mpguino displayed MPG is high or the displayed tank gallons is low at fillup then reduce MicroSec/Gallon by the percentage that the gallons are low or the displayed mpg is high. Like the vss pulses, this would benefit from user contributions about what values work for what specific cars.
4. Pulses/2 revs - not currently used, but a single injector on a 4 cylinder sequential system will make 1 squirt in 2 revolutions. Hope to be able to base RPM on this at some point.
5. Timout(microSec) - defaults to 7 minutes. If there are no injector or speed signals from the car and no buttons are pressed in that time then the display backlight turns off. When activity resumes the display will turn back on and the current trip will reset and the tank trip will be restored to the point of last activity.
6. Tank Gal * 1000 - not currently used, but defaults to 13300 or 13.3 gallons.
7. Injector DelayuS - Represents the mechanical delay of the injector in microseconds. Advanced topic.
Button Functions
1. left: cycle through screeens in reverse
2. middle: cycle through pre-defined brightness settings
3. right: cycle through screeens forward
4. left+middle: tank reset
5. right+middle: current reset
6. left+middle+right: go to setup screen
Table of Car Settings
I am looking for data here, if you have a car to add, email me at combustor@combustory.com with the data.
| Car Year Make Model | Engine | Transmission | VSS (count/mile) | usec/gal |
|---|---|---|---|---|
| 1989 Chevy Celebrity | 3.1 | 4 spd auto | 4000 | 0240000000 |
| 1990 Mitsubishi Eclipse GST | 2.0 litre | 5 speed | 16364 | 126180393 |
| 1994 Suzuki Swift GA Sedan | 1.3 Liter | 5 Speed | ???? | ???? |
| 1996 Jeep Wrangler | 4.0 Liter | 5 speed | ???? | ???? |
| 1997 Saturn SL2,SC2,SW2,S2 | 1.9 | 10000 | 0289967320 | |
| 2005 Subaru Impreza Outback Sport, 2.5RS | 2.5L N/A | 5MT | 8000 | 183165000 (still calibrating) |
Software & Release notes
Here are the latest release notes as of this writing. Get the latest SW from The Arduino Code
8/9/2008 updates for v0.70
More experiments with vss processing. Instant mph is very smooth on saturn but still jumps a bit on the metro. Distance reading on metro appears reasonably accurate (102.6 miles on odo, 102.18 on mpguino using 8208 vsspulses/mile). So the guino is doing a pretty good job of counting the vss pulses, it is a little erratic in timing the pulses though.
want to add EOC miles to the trip next, don't know if it will fit sketch size: 12884
8/1/2008 updates for v0.69
Added event handler and added debouncing on vss. Still trying to clean up reed switch vss signal via software with no luck. will make separate post for vss issue.
Added instantaneous mph (mpg is next), this looks at the time between vss peaks to determine the speed instead of the number of pulses in the last half second, which was jumpy at slow speeds. We are getting really really tight on space. That might also be an issue when 0012 comes out (don't know when).
8/1/2008 updates for v0.68
Removed all dependencies on timer0 so we should be arduino 0012 compatible. This also establishes an ISR under our control for scheduling events. Disabled Timer0 so use millis2(), delay2(), etc.
Knocked off a few hundred bytes by converting LCD to a namespace instead of a class.
7/10/2008 updates for v0.67
Incorporated LCD timings from Yoshi, removed pin 15 code and power up detection code.
moved source code to google/svn Revision 32: /trunk
other happenings: did a test with the scope regarding the voltage drop at peak pulse. I had the guino set a pin high and low within the interrupts receiving high and low and the pulse widths were the same except the generated one was perfectly square. So that is a good thing. Will need to test exactly what voltage level is acceptable.
The power supply on the scope died I think I just need a new TL431C or NTE999 though. I didn't get a chance to witness the vss bounce, the scope died during the attempt.
I am planning on moving all timing critical code to timer 2 with an event handler. I need real interrupt style debouncing for the vss and might as well use it as an event scheduler for debouncing the buttons as well as whatever else. This move will also allow for arduino0012 compatability.
6/27/2008 updates for v0.66
ADDED AN ONBOARD VARIABLE EDITOR!!! VARIABLES STORED IN EEPROM!! Now you can upgrade and not lose your settings and make adjustments in the car. Refer to post 1[/url] for screens and edit usage.
Updated screens descriptions in post 1
Checked source into sourceforge.net, linked post 1 to sourceforge (ran out of room again and wiki didn't like the extension .pde).
Sketch size 11734, 448 bytes free
6/26/2008 updates for v0.65
Added 7 minute activity timeout. It saves the state of the persistent trips (just tank for now) at the point of last activity and after 7 minutes of no injector pulses/vss pulses/or button presses, it turns off the LED backlight and sets up current to be reset and tank to be restored when activity resumes.
Despazed the buttons and Screen labels so they display for a second and accidental double button presses are minimized.
Running out of excuses (and room) to no do the user input/eprom setup screen thing Sketch size 10502 bytes.
6/23/2008 updates for v0.64
Fixed instant/tank screen (was displaying instant/current on that screen).
Improved LCD reinit on reprogram/reset. Can (usually) tell if LCD needs reinitializing. Press left and right buttons to force an LCD init if necessary. Want to free pin 15 for future tasks if it works well enough.
Added a bit of default verbiage to debug mode.
Working on a portable scope deal.
6/20/2008 updates for v0.63
Wrote 64bit arithmetic routines, yay no more messing with "ifs" when it should be math!
Noticed double vss count didn't make it in .62, fixed.
Subtracting 500uS from each injector pulse.
Added cli/sei around top of loop trip copy.
Made big font a smidgeon bolder.
Code updated, sketch size 9812, CPU 54%, free mem 602
Welcome to Combustory
Any questions or comments:
- Send them to - combustor@combustory.com
